24 August 2015

Perhatian Buat Semua Talent-Talent dan Makeup Artist Malaysia!! Dream Beautiful Contest 2015/2016

Suatu pencarian wajah dan jurusolek Mary Kay bagi tahun 2015 bakal berlangsung di bulan September ini!


Seronoknya!!! Nak tau kenapa? Sebab pertandingan ini bukan sahaja memberi penghargaan buat model yang mengambil bahagian, akan tetapi MUA turut dapat ke grand finale di Hong Kong sekiranya model anda berjaya.

Penyertaan adalah mudah:
  1. Tempah slot makeover dengan  Mary Kay beauty consultant anda. Sekiranya masih tiada, sila whatsapp saya di 012-2506664.
  2. Dapatkan makeover dengan menggunakan produk penjagaan kulit dan kosmetik Mary Kay. Anda layak menyertai dengan setiap pembelian produk Mary Kay.
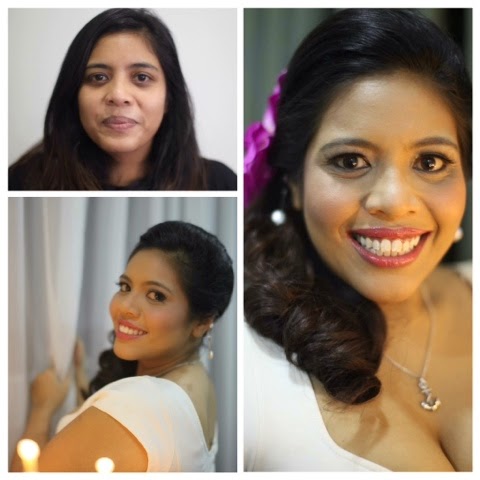
  3. Beauty consultant anda akan memuatnaik gambar sebelum dan selepas anda.
Terdapat beberapa pusingan penyingkiran sebelum pemenang-pemenang peringkat Malaysia diumumkan. Acara grand finale akan berlangsung pada bulan Februari 2016 di Hong Kong! Sekiranya terpilih sebagai pemenang, kedua pasangan model dan jururunding kecantikan akan mendapat sebuah sesi penggambaran global yang bertempat di Amerika Syarikat.

Pertandingan akan bermula pada 7 September 2015. Jadi, apa yang anda tunggu lagi?

Sama ada anda berimpian menjadi model atau seorang jurusolek bertaraf antarabangsa, whatsapp saya segera untuk menyertai Dream Beautiful 2015/ 2016, Siapa tahu anda berpeluang ke Hong Kong, mahu pun Amerika Syarikat?

Belum cuba, belum tahu!


Pemenang Dream Beautiful 2014, Shu Yu Wei.


Calling All Aspiring Models and Makeup Artists! Dream Beautiful Contest 2015/16

There's an upcoming international search for Mary Kay's new face and makeup artist of the year!


I'm so excited about this contest as it gives recognition to the pair of contestants - both the model and the makeup artist.

It's so easy to enter:

  1. Book a makeover session with your Mary Kay beauty consultant. If you don't have any, please whatsapp me at 012-2506664.
  2. Get a makeover and purchase any Mary Kay product to be eligible for an entry.
  3. Your beauty consultant will upload before and after photos of your makeover.
There will be elimination rounds before top three winners announced. The grand finale will be taking place in Hong Kong in February 2016. The winner will get to participate in a global photoshoot happening in the US!

The Malaysian division contest will start on 7 September 2015.  What are you waiting for? 

Whether you're an aspiring model or a makeup artist, whatsapp me know to enter the contest. Who knows you will make a trip to Hong Kong this year.


Last year's winner, Shu Yu Wei.


06 July 2015

A Feature on i100 - The Independent Website

A couple of weeks ago, I stumbled upon a makeup tutorial done by Nikkie on half of her face. She was inspired to do the half-face look from the RuPaul Drag Race (something that we will never see on our shores). Anyways there has been a lot of makeup shaming lately, so that's her motivation for the look. People's been saying that those who wear makeup is either insecure of themselves, doing it for boys or don't love themselves for who they are.

Well, chill people, chill. Makeup is just makeup. Whatever side you're on, please don't shame all those on the other side. It's that simple. I am a makeup artist, yes. But I didn't really wear makeup until I was in my mid twenties. There's no need to shame people who are not in the same boat as you. If you don't like makeup, fine. If you love makeup, it is also fine. I just don't get why people have to put down others who don't have the same opinion as them. Just do your own business. Everybody is happy, right?

So I remember that I did a picture collage of my face with and without makeup many months before, or maybe end of last year. I uploaded it and hashtagged it with #thepowerofmakeup just to show that I support the notion that makeup is fun, and you can wear it or not wear it, and there's no shame in that. As simple as that.

And a couple days ago, which is about almost 2 weeks after I posted the photo on my Instagram, someone (@sniffingflowers) whom I believe I have never met, left me a comment on that post. So sweet of her to do that. She also left me a link from where she found out about my post.
A photo posted by AfifA @ Pip Kasim (@afifa__) on

Went and typed the link on my browser and there it was. My post was featured as part of the article on i100. Apparently it is a sub-division of The Independent, just that the news that are listed on the site is voted by viewers.

I have to say, although it is a little feature of my post, I'm still ecstatic and excited to see it. Hehe.. Hence this blog post, I just want to remember my first International media mention. That's all. Thanks again to Haneesa, for pointing out the feature to me. Without you, I would have never known of it as i100 is never in my go-to website list.

Title of the article

A little background story

That's me! Little ol' me.. :D

You can view the full article here. And here's Nikkie's half-face tutorial on Youtube:


Till next post, take care!

04 July 2015

Salsa Dance Performance Makeup Tutorial

Hey everyone!

Here's a makeup look inspired by salsa dance performance. There's a salsa dance fiesta going on in the city at the moment, but I don't get to go. So this one's dedicated to all the sexy salsa friends of mine, especially those who are performing! Have a blast!!

List of products I use in the video:
Chanel Bronzing Makeup Base
Mary Kay Matte-wear Liquid Foundation (Beige 5, Bronze 1 and Bronze 6)
Mary Kay Makeup Finishing Spray by Skindanavia
Chanel Mat Lumiere Perfection in 20 Beige
Smashbox Bronze Lights in Suntan Matte
Urban Decay Eye Primer Potion
Mary Kay Eyeliner in Black
MAC eye colour in Bamboo, Cork, Espresso, Carbon, Bloomcycle
MAC Fluidline in Blacktrack
MAC Pigments in Violet
Essence Big Bright Eyes in Nude
Sanford Design Ebony in Jet Black
Maybelline Hypercurl Volum' Express Waterproof in Feline Black
NYX Blusher in Dusty Rose
MAC Iridescent Pressed in Belightful
MAC Lip liner in Spice
Mary Kay Creme Lipstick in Red
Lavie Lash in Bluebell

Enjoy the video!


Follow me:
Facebook: http://www.facebook.com/afifakasimbeauty
Instagram: http://www.instagram.com/afifa__
Twitter: http://www.twitter.com/phyp
Google: http://plus.google.com/+PipKasim
Youtube: http://www.youtube.com/c/PipKasim

02 July 2015

My Skincare Routine

A lot of times people asked me what is it that I do differently now that makes my skin condition improves a lot better than before. What is it that I do now that I did not do then?

Let me share with you my daily skincare regime:

Step 1: Cleanse
I cleanse my face with non-drying cleansers. I have a combination skin, with oily T-zone. But that doesn't mean I need soapy cleanser (I actually change my cleanser according to my skin condition at the moment). The last thing I want to do is drying my skin by using soap. That will only make my skin produce more oil as it cannot produce water to counteract the dryness.

I either use my middle and ring fingers, or rotating cleansing brush to massage and cleanse my face at the same time (all the while avoiding my eye areas). I then take a wet, soft wash cloth to wipe the cleanser off my face before rinsing it with water. I just use room temperature tap water to wash my face.

My favorites:
1. Skinvigorate™ Cleansing Brush
2. Timewise 3-in-1 Cleanser
3. Botanical Effects Cleanse (Formula 2)


Step 2: Mask
After I cleanse, I will mask my face. However I don't do this everyday. I probably do this twice a week. There are two types of mask that I use, a hydrating mask, and an exfoliating mask. Hydrating mask will give extra hydration that my skin needs. For hydrating mask, I normally put it on before bed and wash it off the next morning.  The second type of mask that I use is exfoliating mask. This is one of the most important things you need to do for your skin. This mask will absorb extra oil that my skin excrete and at the same time slough off the dead skin cells. This is the step that will help your skin achieve its optimum brightness and gives you that glow. It also allows the makeup to sit on the skin properly without all the nasty dead skin cells to make the foundation looks cakey or patchy.

So every week I shall mask my face every three days or so.  First with exfoliating mask, followed by hydrating mask three days later.  I also use a mask specifically for my lips when I use the face mask. The lips is often neglected as part of skincare routine. They also have dead skin cells accumulating if you don't exfoliate. I always use soft wash cloth to wipe the mask off my face and lips.

My favorites:
1. TimeWise® Moisture Renewing Gel Mask
2. Botanical Effects Mask (Formula 2)
3. Satin Lips Lip Mask

Step 3: Freshen
I choose alcohol-free freshener and softener to freshen my skin everyday. This step will make sure the skin is completely cleansed from the step before and prepares it for better absorption in the next step.  I used facial cotton pad to freshen my face from the neck upwards.

My favorites:
1. TimeWise® Moisture Renewing Softener
2. Botanical Effects Freshen (Formula 2)


Step 4: Supplements
This step came later after I started really caring for my skin. When I was still learning to familiarize with my skincare routine, I didn't have any supplements at all. Only about four months after I started, that I introduced the supplements into my routine. I just didn't want my skin to be overwhelmed by all the products, that's all.

The supplements that I use on my skin is in the form of serum. I have a day serum with SPF 35, a night serum and a whitening serum (whitening serum that I'm using is non-peeling and non-abrasive, it only allows my skin to be the brightest that my skin can). So I'll use the serums (day/ night serum and whitening serum) before my moisturizer.

My favorites:
1. TimeWise® Day Solution Sunscreen Broad Spectrum SPF35
2. TimeWise® Night Solution
3. melaCEP plus+ Ultimate Serum


Step 5: Moisturize
After my serums, I'll put a little moisturizer all over my face. I dot it on my cheeks, forehead, nose, chin and neck, and spread them using the tips of my middle and ring fingers.

I also use the eye cream for my eye areas. Nobody like crows feet before its time, right? I spread the eye cream using my ring finger from the outside corner, going down towards inside corners, and upwards towards outside corners again. Once it spreads evenly, I use a light tapping motion around my eye contour areas using my ring fingers.

For my lips, I use the lip balm so that it won't feel lonely and dry and left out from the whole routine. I always reach out for the lip balm whenever my lips feel dry, so it's always with me.

My favorites:
1. TimeWise® Age-Fighting Moisturizer
2. TimeWise® Age-Fighting Eye Cream
3. Satin Lips Lip Balm

(Note: For all of the above steps, I avoid my eyes and lips, unless I use products that are specific for my eyes and lips, or water on the wash cloth. Also, I don't forget my neck.)

Step 5: Protect
Depending on my mood, I either use only CC cream with SPF 15 for this step or I'll do full on makeup. There are times when I do makeup almost every day in a week.  For this step, I will not regret my eye areas ;)

My favorites:
1. CC Cream Broad Spectrum SPF15
2. TimeWise® Matte-Wear Liquid Foundation

So there you go, this is what I do now - twice a day - well, on most days :P.  However I skip the last step for evening routine. It seems a lot, but once you get into the rhythm, it's not that hard. It may sound like a lot of things, but then, I'm thinking, it's the only one skin that I have.

If you must know what skincare routine that I had before, I only cleanse and moisturize my face. That's it. I hardly put any protection as I didn't like having foundation on my face and all the BB creams that were available didn't have my shade. Funny how I live in a country that has people from different backgrounds and ethnic groups, and yet, most drugstore makeup brands only have foundations and BB creams that only cater for those with light skin color.

Well, if you have any question regarding my skincare routine, or how you can get them do leave a comment down below or you can reach me via Whatsapp or email. Till next post, see ya!

26 June 2015

New Youtube Video Uploaded!

I remembered I took a video when I was playing makeup with my friend, Adeline. Finally I had the time to edit and upload it. Enjoy, people! xoxo


24 June 2015

Spot The Difference aka My Skin Story

OMG.. I found an old photo of meself! I was so shocked when I saw this 😱😱😱.

Anyways... Before we examine the differences, let me state the points of similarity for the comparison photo below:
  • I am in both pictures :D
  • Both pictures were taken while I was in a car
  • I was wearing makeup in both pictures. Although the left one didn't look like it, I was wearing foundation and powder. On the right, I also had my eyes and lips done on top of my foundation and powder
  • Both pictures are of high quality resolution - Left one taken by my Sony Cybershot, and right one with iPad (that's the camera I use for my daily #motd pictures anyways)
  • I did not, in any way, edit or use filter on these photos. I simply cropped and stitched them together.
Can you spot the differences? I can :P
Picture on the left was taken in 2008, while the one on the right was taken this year, about a couple months back. So there's a 7-year gap between those two. In 2008, that was when I just ended my year long makeup artistry course.

If you notice in the picture on the left, my eye areas looked like there's a hint of green.. I was covering a very bad burnt effect due to bad reaction to cosmetics that I put on my face for the makeup class. So I was trying to use makeup to cover up, and it definitely wasn't enough. The surface of my cheeks also looking rough from the scars despite the foundation that I had on. Eye bags? Well those look very apparent as well. Besides that, there are also scars on my forehead area, even though I attempted to cover them with my fringe.

Back then, I learned about skincare and makeup from my makeup academy. But to be honest, the skincare was just in theory,as they concentrated on the makeup a lot. I was also advised not to wear makeup on the days that I didn't have makeup class to 'save' my face. I didn't understand it back then. But now, looking back, it's as if that it was expected that wearing makeup will somehow have damaging effect on the skin. So true enough, by the end of my makeup course, my face was burnt. I have the picture, but I don't have the courage to share it yet. I went to dermatologist and had and skin prick test for all the things I put on my face.  Apparently almost everything gave me allergic reaction, except for a couple of products. My skin is really really REALLY sensitive. My other classmates in the same course didn't have the same reaction I was having. That's how I found out. My dermatologist then consulted me with some medications (which I had to take for almost a year) and asked me to stop wearing makeup and the skincare that gave me the allergic reaction.

After that I just had to wash my face with really mild cleanser and use basic moisturizer with Vitamin E and sun block. Throughout this period, I didn't put makeup on my face at all, so imagine having to go to work with naked 'burnt' face. Not a confident booster for sure, I'm telling you. Everybody noticed and even asked if I was 'okay' cos I looked 'tired'. Yup, that was how bad it was.

My skin continues to be better but at a very slow pace. It took me a couple of years (yes, years..) to get the burnt areas to clear up. And after the makeup course I didn't really put on makeup on daily basis, just on special occasions and only on my clients' faces.

Then about a year ago, I learned about how to take care of skin from a friend, Waheeda. I was skeptical at first, not to mention was very cautious too, about putting on stuff on my skin since it's so super sensitive. But I tried anyways, since she comforted me, saying that we could stop at anytime if I had any reaction. So I went and tried on till the end. I was trying a new brand of foundation and so my friend shared with me the right way to care for our skin before testing the foundation on. I really appreciate her sharing and I absolutely LOVE the foundation (no joke!). Because of the foundation, I decided to sign up as a 'beauty consultant' with Mary Kay. Let me be frank to you, I always buy my makeup supply at a discount, regardless of brands. I really use my professional certificate to my advantage. So same with this instance :D. Signed up, and since I have discounts for the products, I bought my skincare as well because, why not? I have tried it and it didn't give me reactions. The starter kit that I first got came with an anti-aging range so I got another range for my personal use, which is milder for my skin - the Botanical Effects. After a month of using it, I notice my nose became smoother. The blackheads somehow melted away. I also found that my face became brighter. I was surprised for this as the range is not a 'whitening' range. It just showed that with the right regime, your skin will be as bright as it can and will be in its most optimum condition.

After 3 months, I graduated to the anti-aging range, the Timewise. You know, I thought my skin was already in its best condition with the previous range, but boy was I wrong. I COULD get better. I was so excited to see the changes, it motivated me to continue taking care of my skin.

The picture on the right hand side was taken a year after I started using Mary Kay skincare. My skin really got a lot better. AND...... nowadays I get to wear makeup almost everyday! Or whenever I feel like it - which I absolutely love. I don't need a lot of foundation, because the skin underneath is good, the makeup I need is just enough to even out the skin tone and to protect from the external elements. Sometimes, just a layer of CC Cream and I'm good to go. I get to play with colours everyday, I don't have to 'save face' because the makeup and skincare work together to improve my skin.

What's your skin story? I'd love to hear them :)

22 June 2015

Bengkel Tatarias Raya 2015

What is that? (Klik di sini untuk versi Bahasa Melayu)

In a nutshell, it is a Raya-themed grooming workshop. In the class we will cover the makeup and its preparation prior to it, hijab styling, and hair styling (for those who are not wearing hijab).

This workshop is organized by The Durrah Gallery at its new home boutique in Shah Alam.  The workshop is going to be held on every Saturday and Sunday during this Ramadhan from 10am to 2pm.  So every class will have the same content, you just have to pick any of the following dates that suits your availability.

June: 27th, and 28th
July: 4th, 5th, 11th, and12th

Once you have chosen a date, you just need to register and pay the deposit to Ranimah at her mobile 012 - 303 5510. She will advise you with further details.

So what is being covered in the workshop?

We will have skincare, makeup, hijab styling and hairstyling.

Skincare
  • Analysing the skin type
  • Daily skincare routine
Makeup
  • Matching and applying base/ foundation
  • Contouring and highlighting technique
  • Matching and application technique for eyes, cheeks and lips
  • Shaping eyebrows.
Hijab Styling
  • Funky and elegant styling for oblong (regular and big) and half-moon shawl
  • Styling with/ without brooch
  • Accessorizing.
Hair Styling
  • Basic tools - comb, brush, pins, etc.
  • Hot tools - hair dryer, straightener, curling iron
  • Simple and easy updo.

How much does the workshop cost?

The workshop fee is RM300 (inclusive of RM100 deposit) per person. However you'll be getting absolutely more than that!
  • Skincare and makeup workshop by yours truly! Normally my personal makeup class fee is RM350!
  • Hijab styling workshop by The Durrah Gallery or hair styling workshop by again, yours truly, should you not wear hijab
  • Not one but TWO pairs of Elise eyelashes
  • A beaded half-moon chiffon shawl (You can choose your colour! And of course, based on the stock availability)
  • Cosmetics voucher worth RM200 (Yup, so that you can buy the makeup you need for this festive season!).
These are going to be part of your goodie bag! EXCITED!!

This was me when I was visiting the venue. You can tell that I was crazy over the shawls, can't you?

So, what are you waiting for? Check your date book, and call Ranimah at 012 -303 5510 to book your seat. The place can't accommodate many people at a time, so each session is going to be very private and intimate group heheheh... That also means that you have to call now to save your spot. You can also check out the FB event page here.

I hope to see you there soon!

Kisses.


Selamat Menyambut Ramadhan Al-Mubarak


08 June 2015

"I don't wear makeup". Or do you?

I have done a lot of faces for the past 8 years.

And you know, while doing my clients' faces, we always make small talk. You see, one of the questions I'd always ask them is, "So, do you wear makeup a lot?"

Now, you need to understand the difference between "So, do you wear makeup a lot?" and "So, do you wear a lot of makeup?".

Both sounded almost alike, but they have different meaning. The former is emphasizing on the frequency of the makeup application and the latter more on how much makeup you put on your face. So, most of the time, my clients would tell me they don't wear makeup. To which I would further investigate, normally, by asking "Not even face powder?"

Now, here's where they normally say, "Yes, I actually do wear compact powder and lipstick."

Those are makeup, actually.

You see, a lot of ladies assume that makeup means full on makeup, you know, foundation, powder, eyeshadows, eyeliner, mascara, blusher, lipstick and gloss. Actually, makeup is whatever you put on your face after moisturizer. So the moment you're covering or altering or enhancing your skin colour in some way after putting on your moisturizer, it's considered makeup. Even tinted moisturizer is considered makeup since it alters the overall skin tone even though it's minimal. So now you know. You do wear makeup. Just not a lot of makeup. 

So there. I do wear makeup A LOT. Hehehe. Here's a few examples of myself wearing makeup, some a lot, some not.


So, do you wear makeup a lot?

01 June 2015

NPU: Endless Performance Creme-to-Powder Foundation, Eyeliner andLiquid Eyeliner Pen by Mary Kay

I had the chance to try out the newly launched products by Mary Kay a few days before it was available to everyone and I was sooooo excited!

They are launching new, staple products for their regular line and that means, it's going to be available all year round starting this month. When I said staple, I mean products that you can use everyday. These are the things you might want to invest it for great daily looks.

A lot of my close friends know how I swear by the Mary Kay Timewise Matte-wear Liquid Foundation, as it gives me just enough coverage and I absolutely love the consistency. Now I'm even more excited as I got to try the new Endless Performance Creme-to -Powder foundation. It is a cream foundation in a 10-gram pan that you apply with sponge (I love wet sponge) to give you full coverage.  It comes in five shades; Ivory 1, Ivory 2, Beige 1, Beige 2 and Bronze 1.

Endless Performance Creme-to-Powder Foundations


Just like the liquid foundation, this cream foundation smooth over your skin so easily and it gives more coverage that I'm used to when I was using the liquid foundation. The coverage is full, and it glides over my skin so easy. I can choose to set it it with powder for more matte finish or leave it for more dewy finish. I haven't tried it on dry skin, but since I have combination skin, it sets more dewy for me. What I like about it, is that it feels very light on my face. I'm giving this two thumbs up!! I actually tried it on my face, but I forgot to take pictures before I washed it off! Arrghhh!!!

What the foundations look like inside.

Mary Kay's Eyeliner is the eyeliner that I reach out and wear everyday. So you  have to understand my excitement when I know they are relaunching the range with new formula and more colours! I'm most excited with this range compared to the other products launched this month.. Hehehe.. So, they have new colours with this range; MK Deep Brown, MK Dark Denim, MK Steely, MK Turquoise and MK Black. It comes in a retractable pencil, just like the previous formula.

Retractable Mary Kay Eyeliners


I LOVE this eyeliner!! The colour is more pigmented, and creamy when I put it on. And it really stays on. I mean, really, stays ON! Talk about long-lasting. I was having some allergic reaction on my lids for few weeks now (that explains why the lack of #motd posts on my Instagram). So I tried on my eyes and really used the eye makeup remover to take it off. I even swatched in on my forearms and I didn't remove it immediately. Six hours later, I tried washing and rubbing it off with water. And It wouldn't come off, literally wouldn't budge! So I know it's water and smudge proof! Wooho!! Love this! Two thumbs up!

The retractable eyeliners swatches after 6 hours! It wouldn't budge!


Last product I tried was the Liquid Eyeliner Pen. It comes in only one colour, black, in a pen with felt tip. The felt tip really helped with the application if you're just trying out eyeliner as part of your daily routine. The sharp end surely helps with the cat eyes or glamour liner precision. However, what I didn't like about it was that, it is not waterproof and it doesn't finish off as really matte. You can easily wash it off with water.  So, if you're a fan of pen eyeliner, you might want to set it with your eye shadow or you can use it to get the shape of the eyeliner on your lids, then follow through with a gel liner if you want to make it last longer. Because I know it's sometimes easier to use this pen first to get the shape as opposed to using gel liner on a brush, especially for newbies. One BIG pros to having a non-waterproof eyeliner? Obviously, it's wudhu' friendly!!

Mary Kay Liquid Eyeliner Pen


Swatches of the retractable eyeliners and the liquid eyeliner pen


I haven't got a chance to create looks using these products yet, but do follow my Instagram as I'll be updating more looks there! Till next post, kisses!

P/S: Please Whatsapp me for appointments to try out any of these products!

26 May 2015

Bridal Hair Class with Ayangkamell


I've been wanting to go to Ayangkamell's Bridal Hair Class for a while now. I really love all his bridal updos and it is one of the many reasons why it made me follow him on his social media pages.  I attended his makeup class before, organized by my partner-in-crime way back then, Awin. It was a very enjoyable and an eye-opening class. 

I know there are a lot of talented makeup artists in Malaysia that have great makeup and hairdo skills, but among the reasons why I like Ayangkamell's style is because he has a very nice flair when it comes to updos, and his style is both simple and elegant. I swoon everytime he uploads any of his work on Instagram (stalker, much? :P). Hehe..

Anyways... After a while, the time was right for me to join his class so I asked Zam aka Alkazam Da Cute to register me for this session. 

I always look at Ayangkamell as one of my sifus, but he is so down to earth that he treated all of us in the class not as students, but his colleagues, peers. For someone with 20 years in the industry, he wasn't stingy with his experience at all. He simply shared with us. All questions were answered best to his knowledge. 

The class was structured to have two sections: theory and practical. He covered all the basics to doing bridal updos and products he uses while on the job. He shared the tools, the brands, where we can get it, who should we ask for, etc. Like I mentioned, he just gives. The theory ended with a demo on how to achieve two different buns: high and low. I really appreciate the explanation on how he execute every step of the process. 

Next, the practical! I was sweating hahaha.. We had to do both high and low buns so he could give us feedback and points for future improvements. I started with the low bun first because I thought it was easier. Well, not at all. The demo seemed so easy and straightforward. But there I was, sweating like crazy. But I did manage it with the help of Ayang and fellow participants. Fuuuhhh!!! Moving on to high bun. I knew it wasn't gonna be easy so I was prepared for the worst. But again I managed to pull through with Ayang's help. 

Thank god for this practical session. I get to see how different different type of hair required different preparation and it would bring different outcome. In this section of the class, Ayang went around the room correcting or improving our techniques. I also got to ask him different scenarios when dealing with updos. And of course he entertained to all of my questions. 

I really appreciate the structure and contents of this class. It has a good context, really manageable modules and easy to comprehend. I think what makes it so engaging is the trainer himself. Thank you Ayangkamell for being so generous in your class. I am truly grateful to have an awesome sifu like you. 


16 May 2015

Latest Works

Here are some of my latest makeup and hair works. 

These photos are taken using Panasonic Lumix GF5. Aside from cropping and collaging, no photoshop or enhancement of any kind took place. 

Come visit my Facebook Page for more pictures!

13 May 2015

Stage / Character Makeup Workshop @ UTEM

remember back when I was in university, all students were required to take co-curriculum subjects as part of the requirements to graduate. And I remember the only exciting thing that was offered was Gamelan. I tried to recall what other subjects offered, but they were not memorable at all. The first semester it was offered, I didn't get it, as I sent in the application quite late during the day, I think. So I ended up with something I can't share with you all, reason being, I simply don't remember... The following semester I was determined to get it, so I submitted my application first thing in the morning.

And I got it! I was so happy and I really enjoyed that class. Now I can't play any Gamelan instrument to save my life, but back then, I could play quite decent. I passed the test with flying colours to boot!

That's why when I was invited to teach for a Theatre class at Universiti Teknikal Malaysia Melaka (UTEM), I was so ecstatic. Why didn't we have this back then? It would be such a fun class to be in.  Don't you think?

On the day that I taught, the class started out with some rehearsals of short plays that the students prepared for their assignments. Also while waiting for the rest of the class to arrive. This part have not changed much from my uni days.. Heheh.. Anyways, I got to see some of them in action, which was quite impressive. It showed that they were committed with their assignments. Some were funny and some were serious.

I was given an hour slot for my workshop, which is quite short for stage makeup class. So I shared what I thought the most important tools to know and quite useful for quite a lot of different character makeup - the light theory also known as contouring and highlighting. So I covered the theory part, had a quick little demo on the lecturer, and let the students did the contouring and highlighting on their own faces. All in under an hour! The students were given 30 minutes to do their own makeup, and their task was to make their faces to look like old folks. Heheheh...

During demo


I had an enthusiastic group of students on that day, so once given the tools, they were well on their way to old age. Haha.

They were really into it.. 
Comparing fine lines and wrinkles


Over all, I was so happy to have such sporting group of students to teach on that day. They were all so friendly and very eager to try. I even gave them grey hairs just to make them look realllllyyy old!

Say hello, grandpa!
Funky gramps with spiky hair :)
How sporting are they to try this unflattering makeup on their faces??

For more photos from the class, please go to my Facebook page. Till next post, bye bye!

I was the 'youngest' in this group photo. Love it!


12 May 2015

Exciting New Services Added!!


So excited to announce that new items have been added on my services list!

These new services are added with my bridal customers in mind, as they have a million things to do for their big day. For your convenience, I have enlisted the help of a professional hairstylist with over six years of experience working in one of Malaysia's leading hair salons.

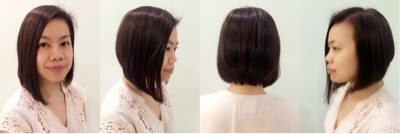
The new services added are pre-wedding hair services to cater to both the bride and groom's needs. Why not have your hairstylist come to you for hassle-free services in the comfort of your own homes.

Go here to check out our pre-wedding hair services packages!

Before

After
After
    

Before
After


Before
After


Related Posts Plugin for WordPress, Blogger...